USER GROUPS
Add New User Groups
Manually Create User Groups
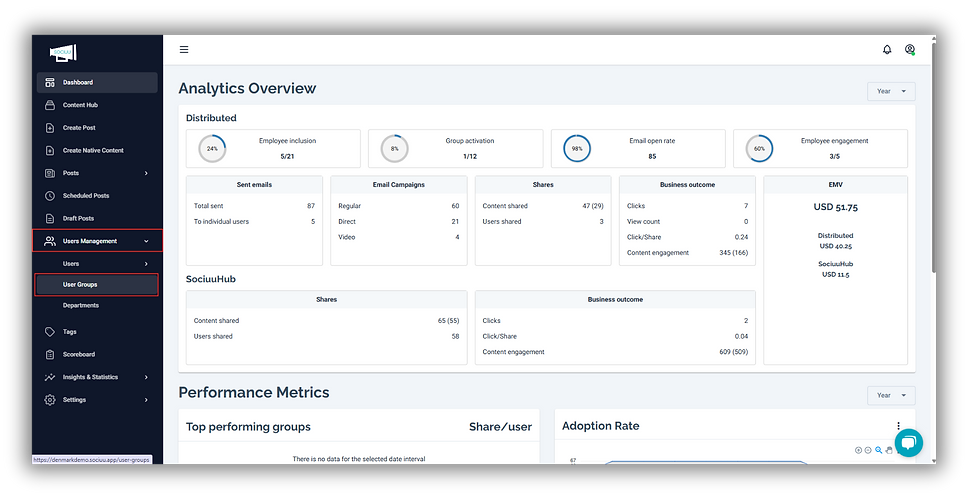
Navigate to the left side menu panel, go to User Management, and then User Groups.
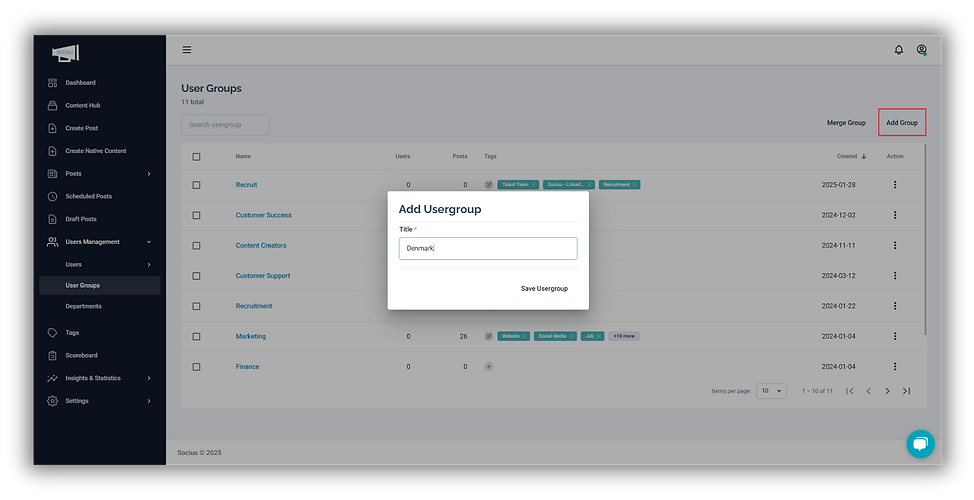
Click on the Add Group button on the right side, and give it a Title Name, and then click Save Usergroup.
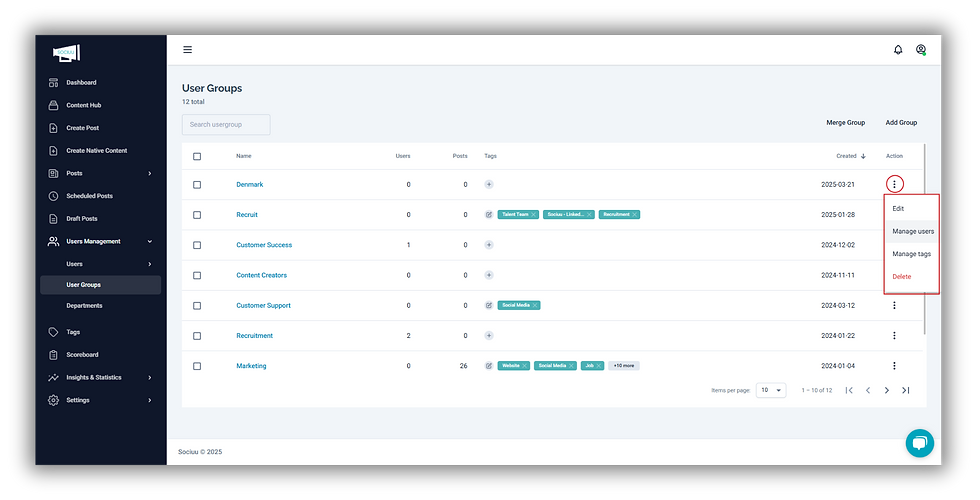
Now that you have created a User Group, you need to add users, and tags to the user group. Click on the three action dots on the right side, and select Manage Users.
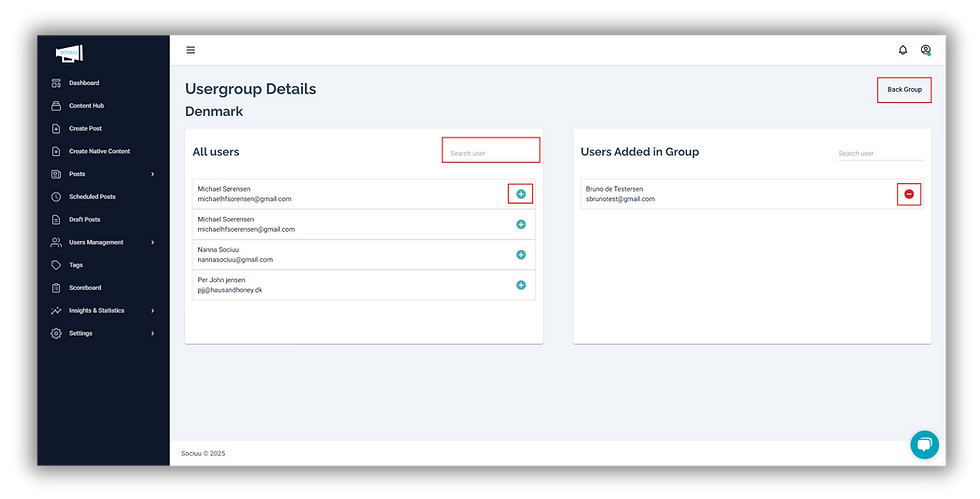
You’ll now see an overview of all users on your platform displayed on the left-hand side, along with a search bar to help you quickly find specific users.
To add a user to the group:
-
Locate the desired user.
-
Click the green Add button next to their name.
This action will move the user into the selected user group.
On the right-hand side, you’ll see a list of users who are already part of the group.
To remove a user from the group:
-
Find the user in the list.
-
Click the red Remove button next to their name.
Once you’ve finished adding or removing users, simply click the Back Group button on the right-hand side to return to the main view.
After Managing Users, the next step is to click on Manage Tags.
Here, you can select the relevant tags that should be associated with this specific user group.
Keep in mind: Tags are the link between your content and your users, so it's important to choose the ones that reflect the interests or roles of the group accurately. Read more about tagging here.

And that’s it! You’ve successfully created a new user group and added both users and relevant tags to it.
Great job – you're all set!
Merge Existing User Groups
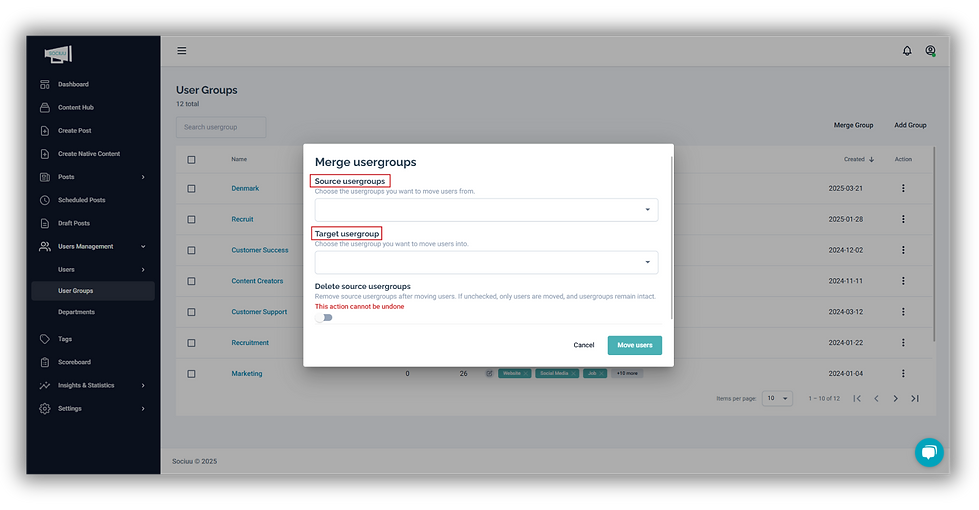
Navigate to User Management, then select User Groups. In the top-right corner, click the Merge Groups button to proceed.

Next, select the Source User Group by clicking the dropdown arrow. This is the group you want to move users from.
Then, choose the Target User Group — this is where the users will be added.
Delete Source User Group (optional):
-
If enabled, users will be removed from the original (source) group and only belong to the new (target) group.
-
If left disabled, users will be added to the target group while still remaining in the source group.
Create or Update User Groups with Import
CREATE GROUPS WITH DUPLICATE ACTIONS
Add more users divided into user groups.
With skip duplicates, you do not update
existing users and groups, you only add new.
1. Create a user list in Excel or CSV - Example file
2. Go to import/export and upload the list
3. Map columns
4. Analyse import
5. Choose the duplicate action 'Skip'
6. Import

With skip as duplicate action:
New users are added
New groups are added and employees are added to the new groups
No changes are made to existing users or existing groups
UPDATE AND ADD USER GROUPS
Update existing users and add new users to your Sociuu account
1. Create a user list in Excel or CSV - Example file
2. Go to import/export and upload the list
3. Map columns
4. Analyse import
5. Choose the duplicate action 'Update and add user group'
6. Import

With Update and add user group:
You add new users
New groups are created and employees are added to the new groups
Existing users and user groups are updated
UPDATE AND REPLACE USERS IN USER GROUPS
Update existing users and replace users in existing user groups
1. Create a user list in Excel or CSV - Example file
2. Go to import/export and upload the list
3. Map columns
4. Analyse import
5. Choose the duplicate action 'Update and replace user group'
6. Import

With Update and replace user group:
You add new users
New groups are created and employees are added to the new groups
Users in existing user groups are replaced
All user groups remain, they are not deleted with this action
DELETE USER GROUPS
Delete user groups in Sociuu
1. Go to User groups in the menu
2. Find the user group you want to delete
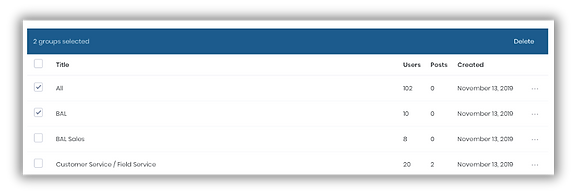
3. Tick off the box next to the User groups and
a blue bar appears at the top.
You can also press (···) and delete single user groups
4. Delete. This action is not reversible.
